Achieving a stunning, mirror-like finish on leather footwear is a skill that transforms ordinary maintenance into an art form. This process, often referred to as glazing, requires patience, the right products, and a precise technique. Many enthusiasts turn to Saphir Médaille d'Or products for their exceptional quality and proven results. However, beginners frequently encounter pitfalls that prevent them from achieving that luxurious shine. Understanding these common mistakes and learning the proper methods can elevate your shoe care routine and keep your leather looking impeccable for years to come.
Essential Saphir Products and Tools for Proper Shoe Glazing
To embark on the journey of shoe glazing, assembling the correct arsenal of products and tools is paramount. Saphir Médaille d'Or offers a comprehensive range of leather care products designed to clean, nourish, and polish smooth leather. The foundation of a successful glazing process begins with selecting the appropriate paste, wax, and accessories that complement the leather type and desired finish. Without these essentials, even the most diligent effort will fall short of producing that coveted high gloss.
Selecting the Right Saphir Paste and Wax for Your Leather
The distinction between Saphir Pâte de Luxe and Mirror Gloss is crucial for achieving optimal results. Pâte de Luxe serves as a cleaning and nourishing agent, providing essential leather nourishment while preparing the surface for subsequent layers. This product is ideal for maintaining the health of smooth leather, ensuring it remains supple and free from dryness. On the other hand, Mirror Gloss is specifically formulated to deliver a high gloss finish, acting as the final step in the glazing process. Understanding that Pâte de Luxe focuses on conditioning while Mirror Gloss aims for brilliance helps in selecting the right product for each stage. Beginners often confuse these two, applying Mirror Gloss prematurely without proper preparation, which leads to uneven results and diminished shine. Additionally, colour matching is essential. Saphir products come in various shades to suit different leather tones, and choosing the correct colour ensures a seamless and professional appearance. Overlooking this detail can result in mismatched finishes that detract from the overall aesthetic.
The Role of Quality Brushes, Cotton Cloths, and Shoe Trees
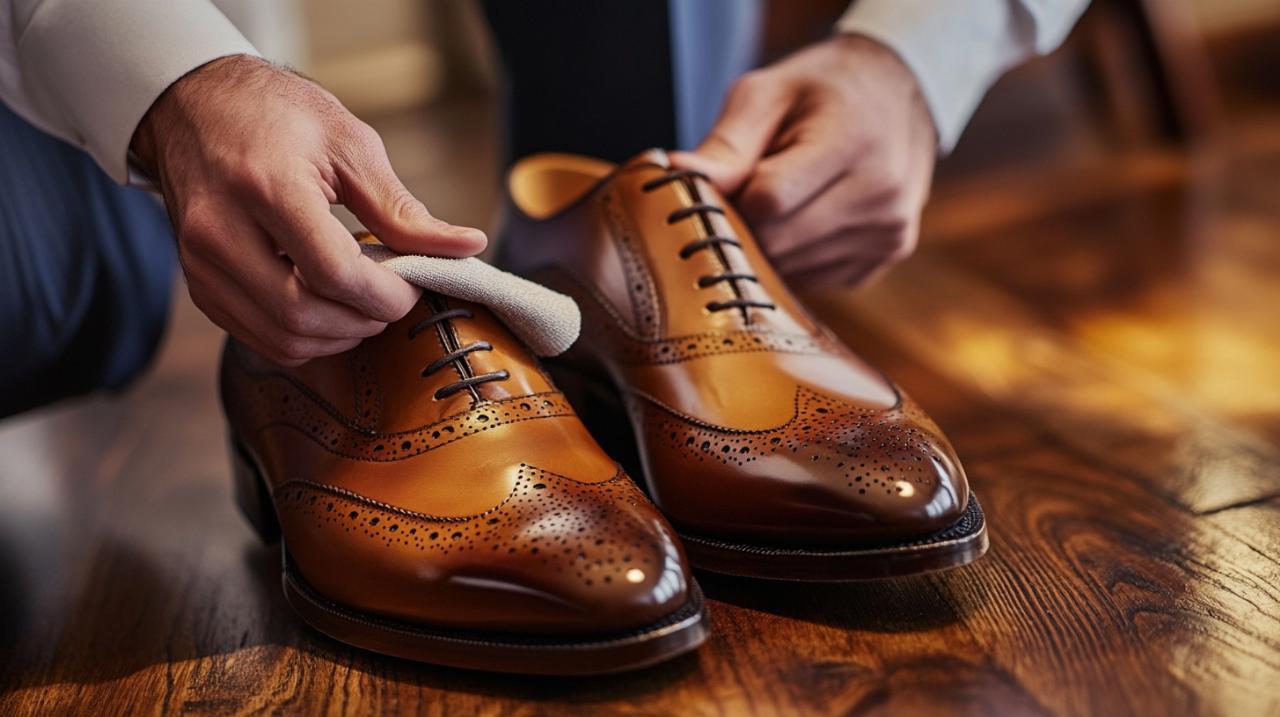
Beyond the pastes and waxes, the tools used in the glazing process significantly influence the outcome. A high-quality polishing brush is indispensable for buffing and distributing the product evenly across the leather surface. The bristles of a polishing brush lift the wax and cream, creating a smooth, even layer that enhances the shine. A square cleaning and shining cloth is equally important, as it allows for precise application and the removal of excess product. When applying Mirror Gloss, using a soft cotton cloth in circular motions ensures that the wax penetrates the leather pores, building layers gradually. The polishing glove serves as the finishing touch, providing a final buff that brings out the mirror effect. Shoe trees are another critical component, maintaining the shape of the footwear and preventing creases that could mar the glazed surface. By investing in quality accessories, beginners set themselves up for success, avoiding the frustration of subpar results caused by inadequate tools.
Step-by-step technique: achieving a perfect mirror gloss finish
Mastering the glazing technique requires a methodical approach and an understanding of each phase in the process. The mirror shine process can take anywhere from thirty minutes to three hours, depending on the level of gloss desired and the condition of the leather. Patience is key, as rushing through the steps will compromise the final appearance. By following a structured method, beginners can develop their skills and consistently produce exceptional results.
Preparing your leather shoes before the glazing process
Preparation is the cornerstone of a flawless glaze. Before applying any polish or wax, the leather must be thoroughly cleaned to remove dirt, old product residue, and oils that can interfere with adhesion. Saphir Renomat is recommended for this purpose, as it effectively strips away accumulated layers without damaging the leather. Applying Renomat with a clean cloth ensures that the surface is pristine and ready to absorb the conditioning and polishing products. Once cleaned, the leather should be allowed to dry completely. Skipping this step or failing to clean properly is a common mistake that leads to uneven shine and poor product absorption. After cleaning, conditioning the leather with Pâte de Luxe restores moisture and flexibility, creating an ideal base for the wax layers. This stage not only nourishes the leather but also fills in minor imperfections, resulting in a smoother surface. Beginners often underestimate the importance of preparation, diving straight into polishing without addressing the foundational needs of the leather.
Mastering the Application Method for a Luxurious Shine
The application of Mirror Gloss demands precision and repetition. To achieve the desired high gloss, approximately six to seven layers of wax are necessary. Each layer should be applied in thin, even coats using circular motions with a cotton cloth. This technique ensures that the wax fills the pores of the leather gradually, building a smooth and reflective surface. After each application, allowing the wax to dry is essential before proceeding to the next layer. Rushing this process by adding multiple layers too quickly results in a dull, uneven finish. Once the layers are complete, a polishing brush is used to buff the surface, enhancing the shine and removing any excess product. The final step involves using a polishing glove to achieve that luxurious mirror effect, gently buffing the leather until it reflects light brilliantly. Beginners frequently apply too much product at once or fail to allow adequate drying time, which prevents the layers from bonding correctly and diminishes the overall gloss.
Common Glazing Mistakes Beginners Make and How to Avoid Them
Even with the right products and a clear understanding of the technique, beginners often fall into predictable traps that hinder their progress. Recognising these common errors and learning how to avoid them is essential for anyone seeking to master shoe glazing. By addressing these pitfalls, enthusiasts can refine their approach and achieve professional-quality results.
Overlooking colour matching and product compatibility
One of the most frequent mistakes is neglecting to match the product colour with the leather. Saphir offers a wide range of shades to accommodate various leather tones, yet beginners sometimes choose a generic or neutral colour, assuming it will work universally. This oversight can lead to noticeable discolouration or an unnatural finish that detracts from the shoe's appearance. Additionally, using incompatible products, such as combining creams and waxes from different brands, can result in poor adhesion and reduced effectiveness. Saphir Médaille d'Or products are formulated to work synergistically, and deviating from this system may compromise the results. Ensuring product compatibility and accurate colour matching is a simple yet vital step that beginners must prioritise. Taking the time to consult customer reviews and expert guides can provide valuable insights into which products and colours are best suited for specific leather types and finishes.
Improper buffing techniques that ruin the mirror effect
Buffing is where the magic happens, transforming applied wax into a brilliant shine. However, improper buffing techniques can undo all the hard work invested in preparation and application. One common error is using excessive pressure when buffing, which can remove layers of wax instead of polishing them. The key is to use gentle, consistent strokes, allowing the brush or glove to glide smoothly over the surface. Another mistake is buffing before the wax has fully dried, which smears the product and creates streaks. Patience during the drying phase is crucial, as each layer must set before the next step. Additionally, using a dirty or worn brush can introduce contaminants or fail to distribute the wax evenly, resulting in a patchy finish. Regularly cleaning brushes and replacing them when necessary ensures optimal performance. By mastering the nuances of buffing, beginners can unlock the full potential of their glazing efforts and achieve that coveted mirror shine. Understanding that the process is cumulative, with each layer and buffing session building upon the last, helps maintain realistic expectations and encourages persistence.